BMI Secure Upload Portal
This article will walk you through how to use your BMI Secure Upload Portal
Secure Upload
Secure Upload will be used when you want your clients to upload documents to you. Direct them to your email signature link, and then have them follow the below steps.
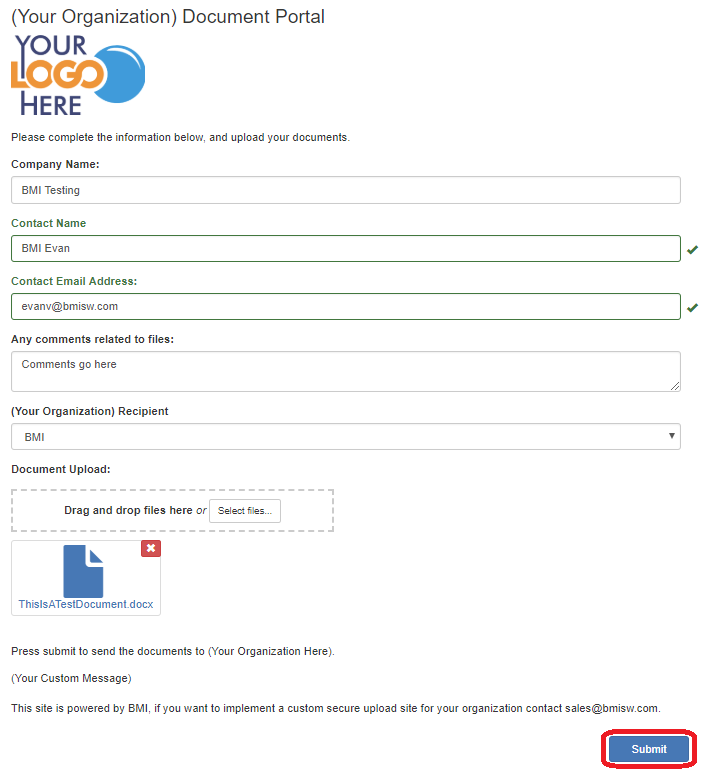
Secure Upload - Fill Out Information
After clicking the email signature link button, your client will be met with this page. Have them fill out the information in the fields provided, and upload their files to the spot provided. Then when they have filled out the fields and uploaded your documents, click the blue “Submit” button in the bottom right corner.

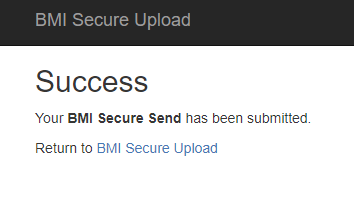
Secure Upload - Finished
After clicking the “Submit” button, your client will be met with this page. This means that they have successfully uploaded your documents. From here they can click on the link to go to the dashboard, or they can, simply, leave the page.
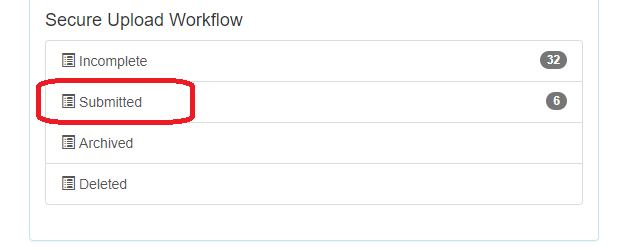
Secure Upload - Viewing Documents
There are two ways you can view documents that have been sent to you.
- You can go to the dashboard and select the “Submitted” button under the “Secure Upload Workflow” heading, as shown above. This will show a list of all the Secure Upload forms that have been submitted to you (In this example, I have six forms that have been submitted to me). Simply, select the desired form from the list, and then you can click on the uploaded documents to download and view them.
- You will receive a notification via email when your client uploads documents to you. This email will contain a link to the form. Click that link and that will take you to the form containing the uploaded documents. Click on the uploaded documents to download and view them.
Secure Send
Secure Send is used when you want to send documents to your clients. Go to your secure portal and follow the steps below.

Secure Send - Begin
Click the “Begin Secure Send” button to start a new Secure Send form.

Secure Send - Fill Out Info
After clicking the begin button, you will me met with this page. Fill out the client’s information, select yourself as the sender, and upload your files to the spot provided. Then when you have filled out the fields and uploaded the documents you would like to send to client, click the blue “Submit” button in the bottom right corner.
Secure Send - Finished
After clicking the “Submit” button, you will be met with this page. This means you have successfully uploaded your documents. From here you can click on the link to return to the dashboard, or you can, simply, leave the page.
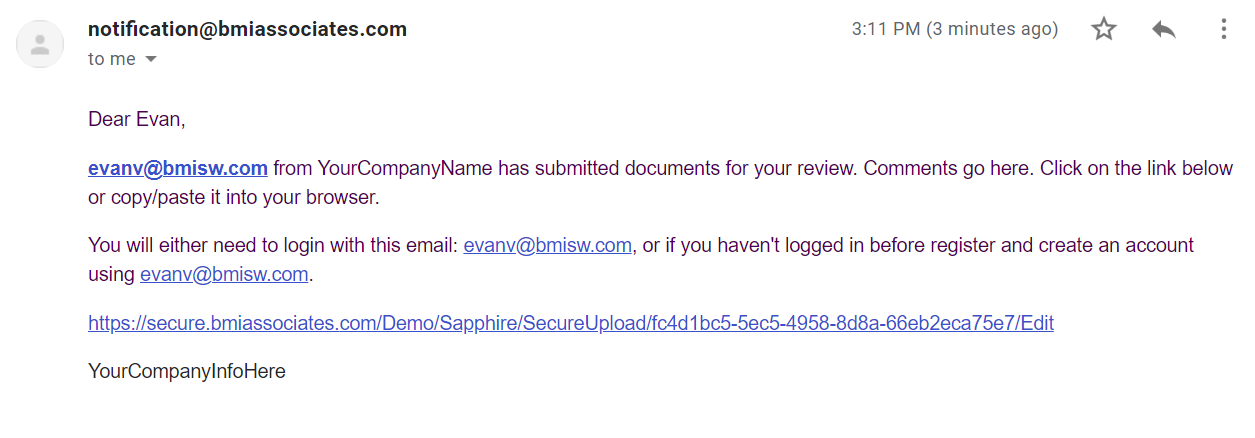
Secure Send - Client Notification
Your client will receive a notification via email after you click the “Submit” button. The image above is an example of that notification email From the email your client can click on the link to view the documents you have sent them.

