Click an image to zoom.
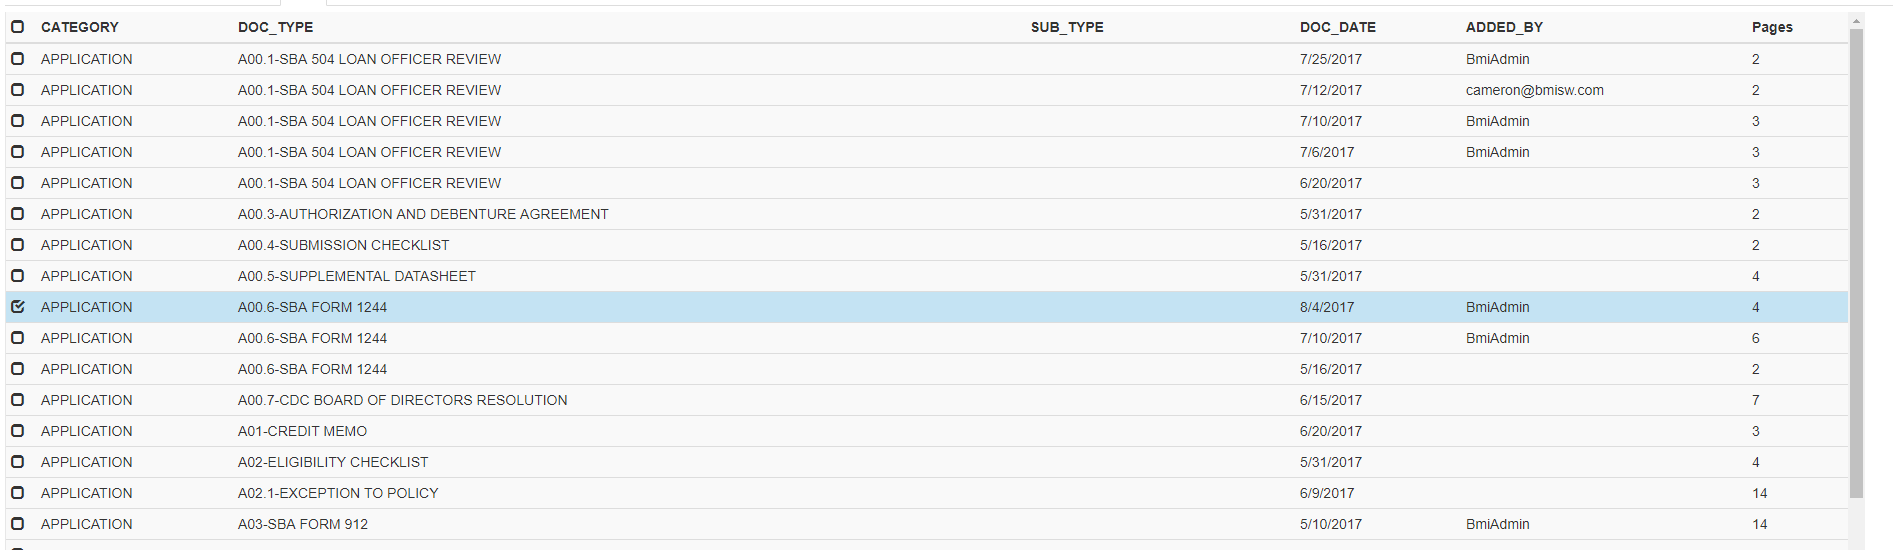
Select Documents
Within BMI, select the document(s) you wish to have re-signed. You may select one or multiple documents at the same time. Click the green “View” button, at the bottom right corner, to open.
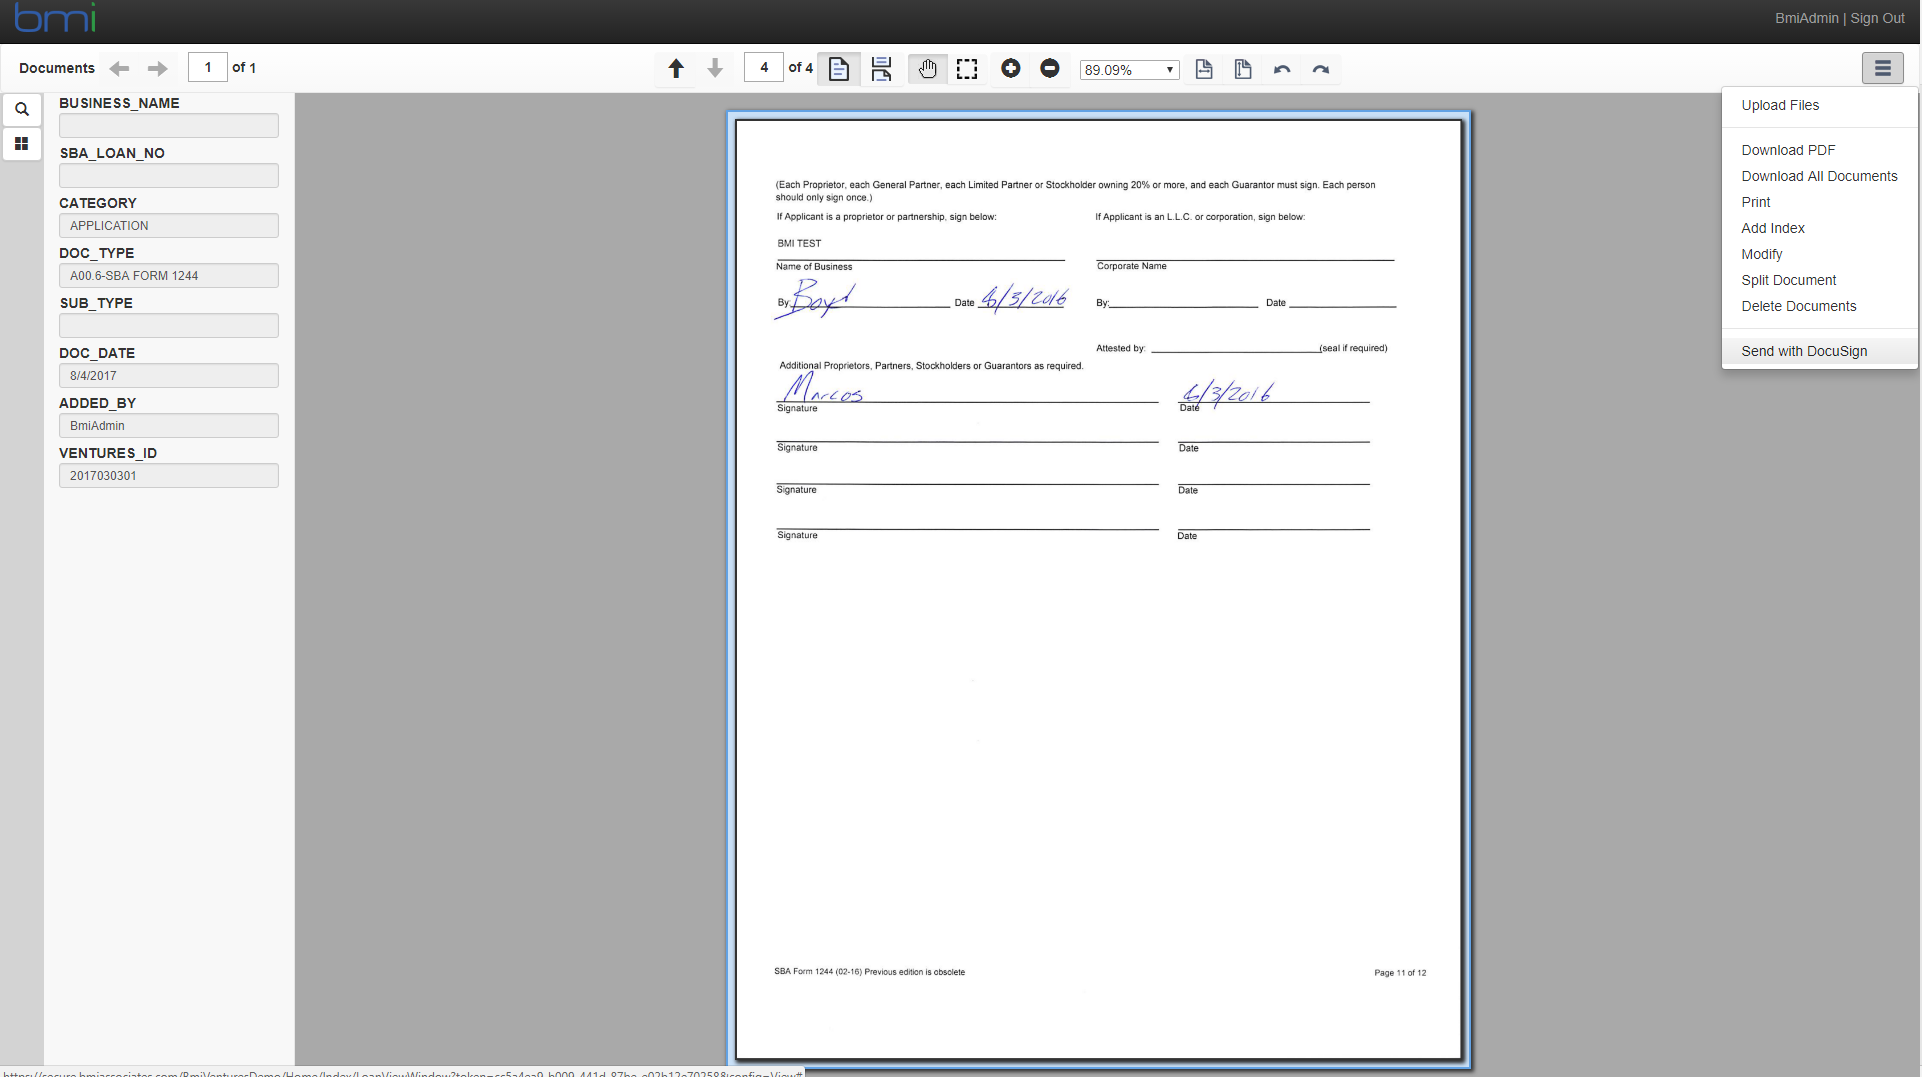
Send with DocuSign
Once the document(s) have been opened, click “Send with DocuSign”. This is found in the drop-down hamburger menu located at the top right corner of the screen.
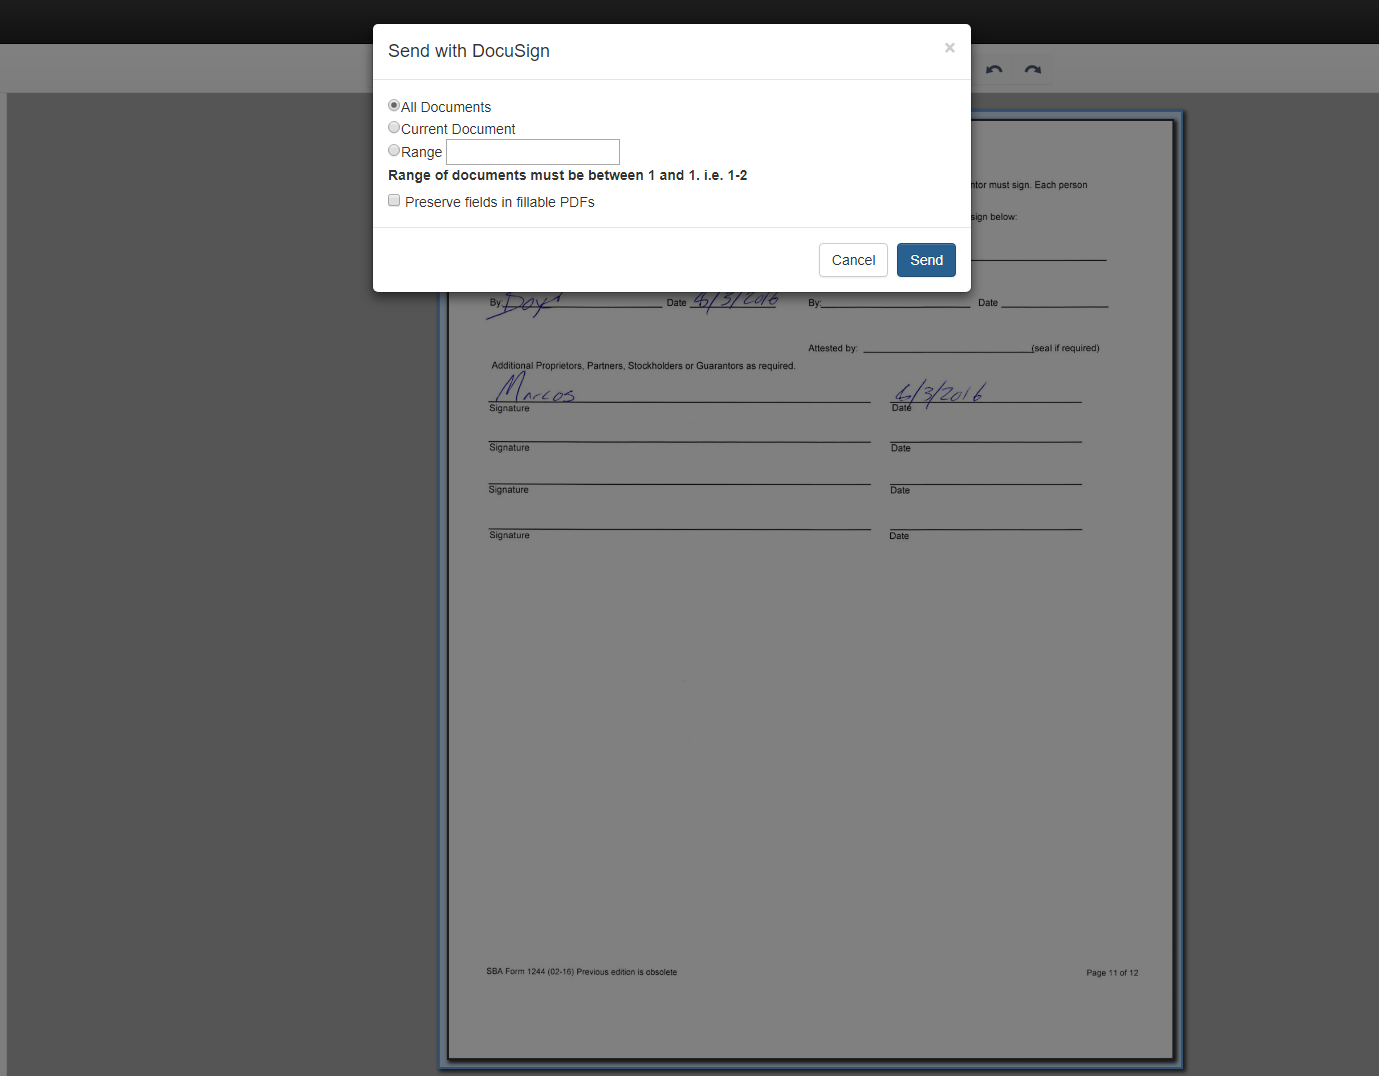
Send with DocuSign Options
Once the “Send with DocuSign” option has been selected, a small window will appear such as the one pictured above. Check box “All Documents”, “Current Documents”, or “Range” (according to your needs). Then click the blue “Send” button.
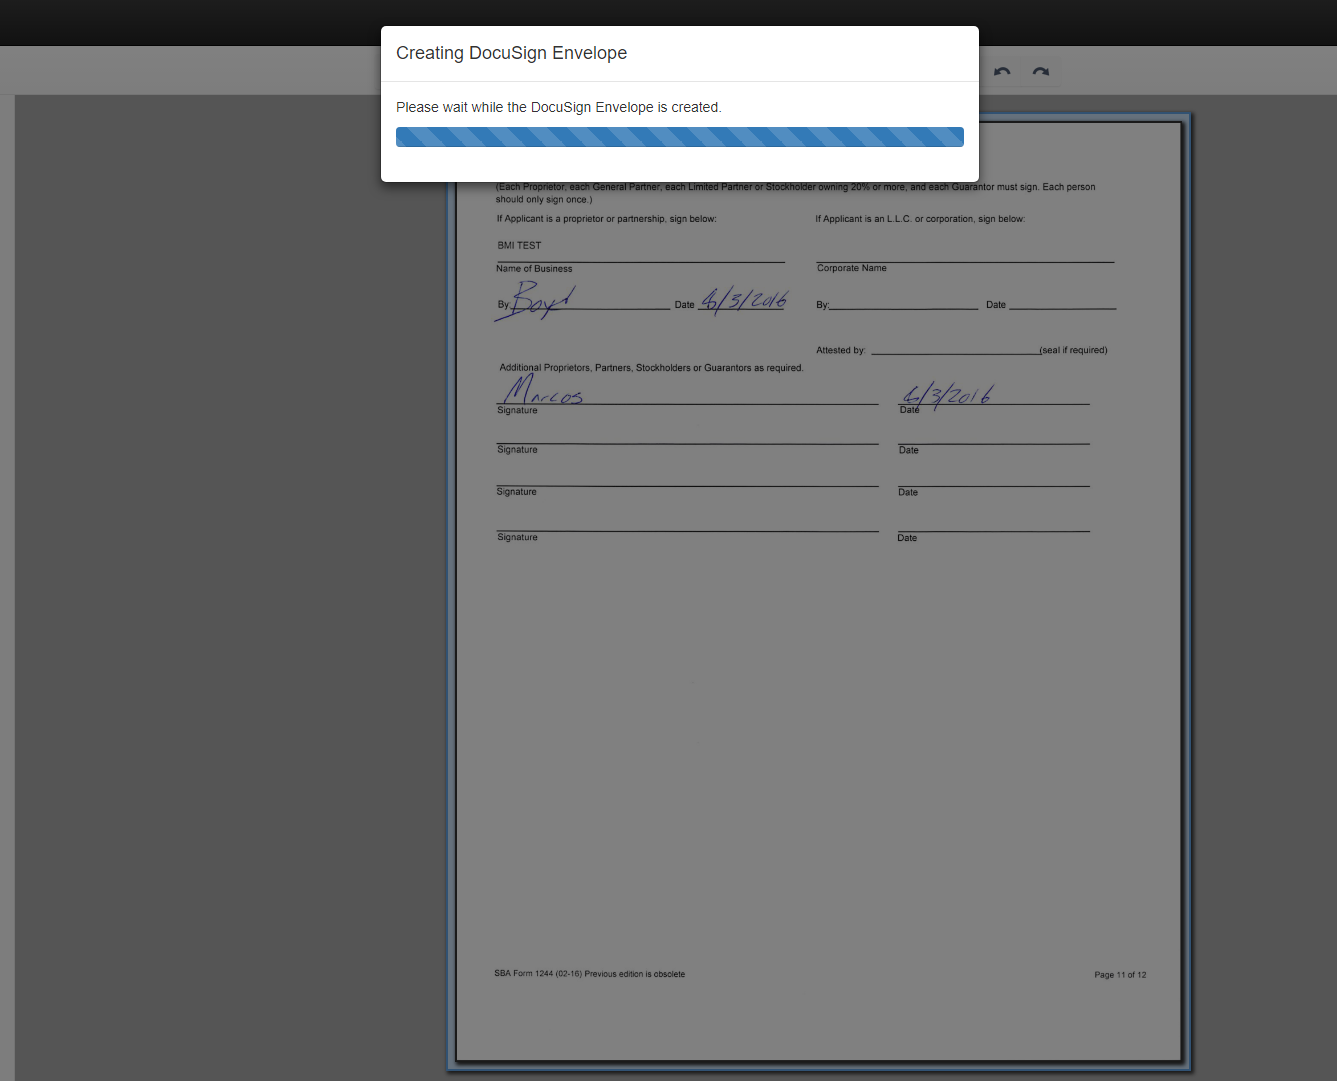
Creating DocuSign Envelope
After clicking the “Send” button, a message prompt will appear. It will show a loading bar stating: “Please wait while the DocuSign Envelope is created”.
DocuSign Window
A DocuSign window will then open. It will contain the document(s) previously selected.

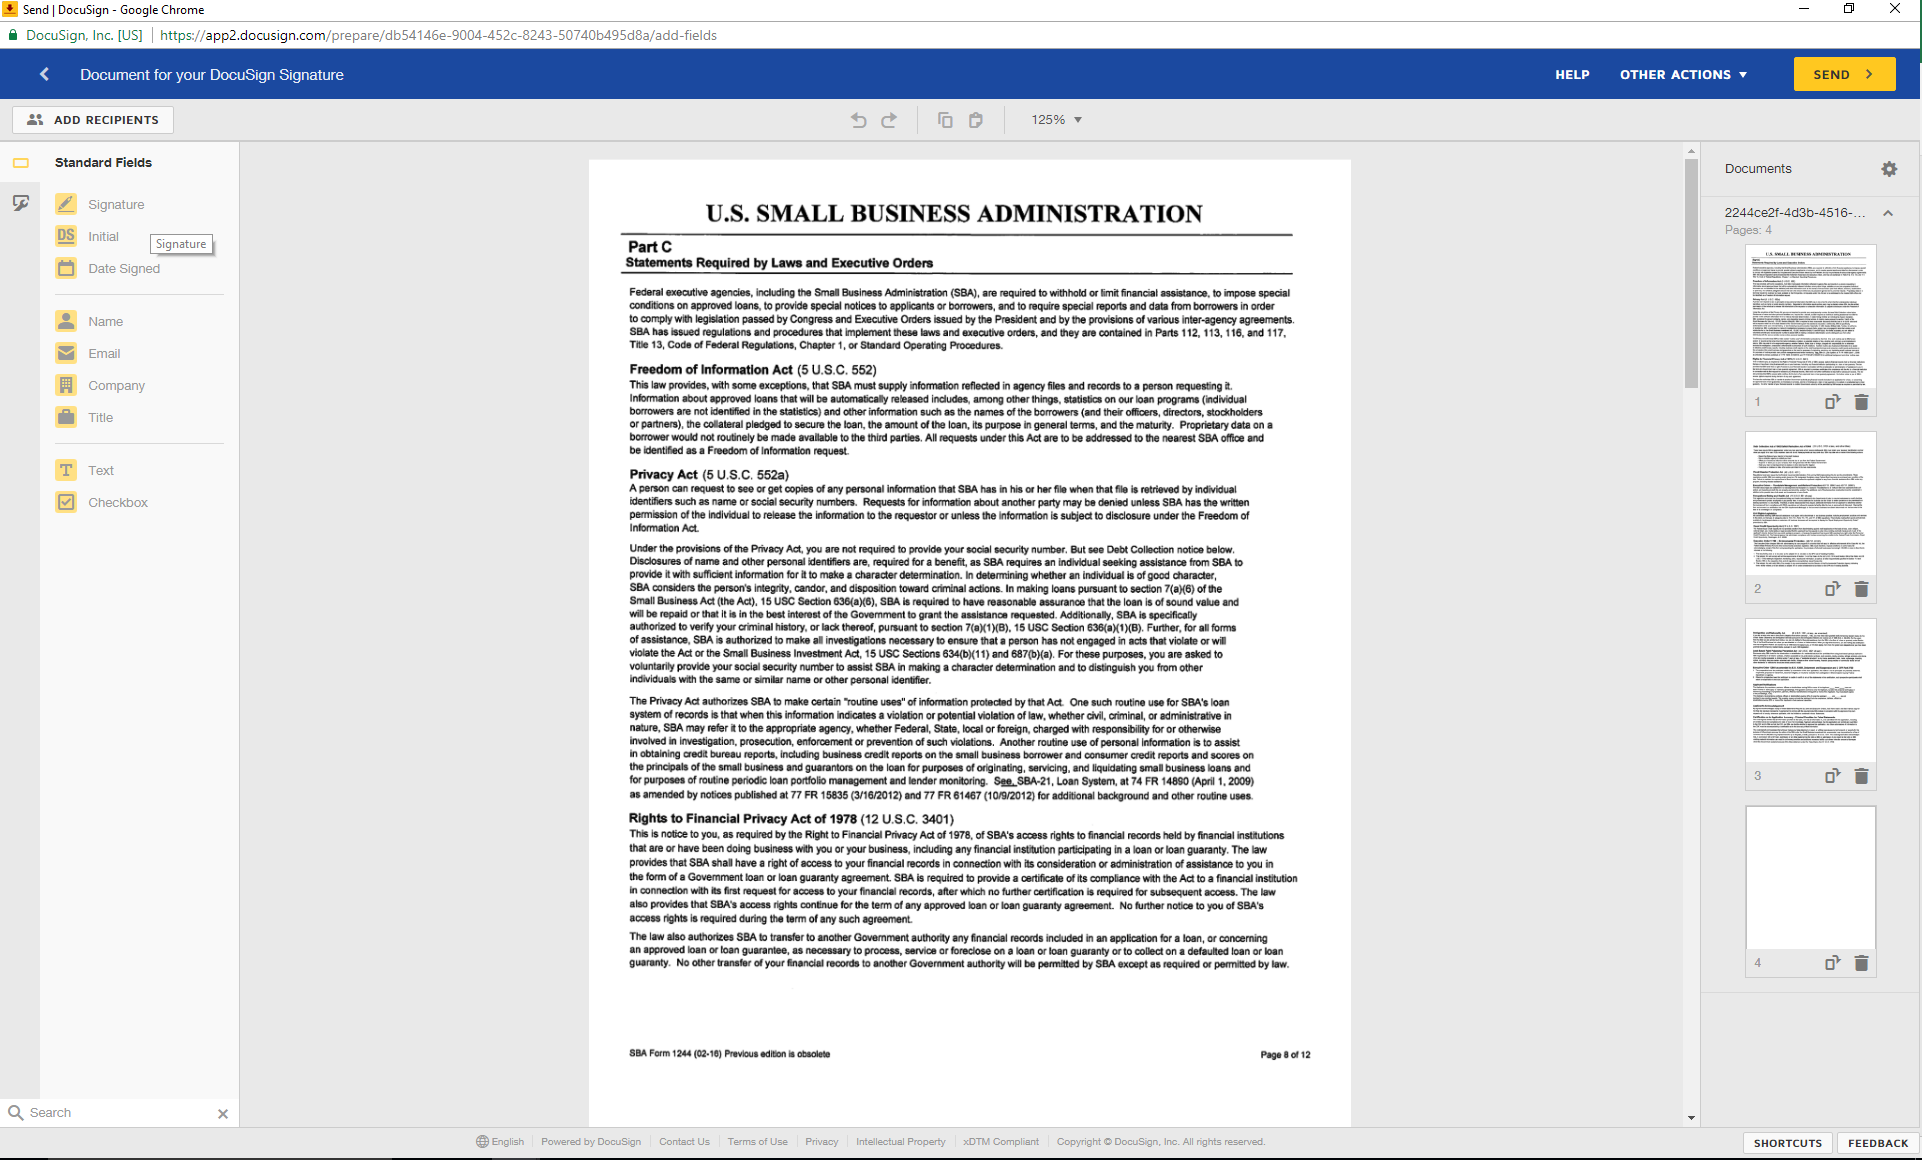
Signature fields within DocuSign
From this screen the document(s) can be sent to the appropriate recipients. Be sure that the signature fields are added to the proper places.
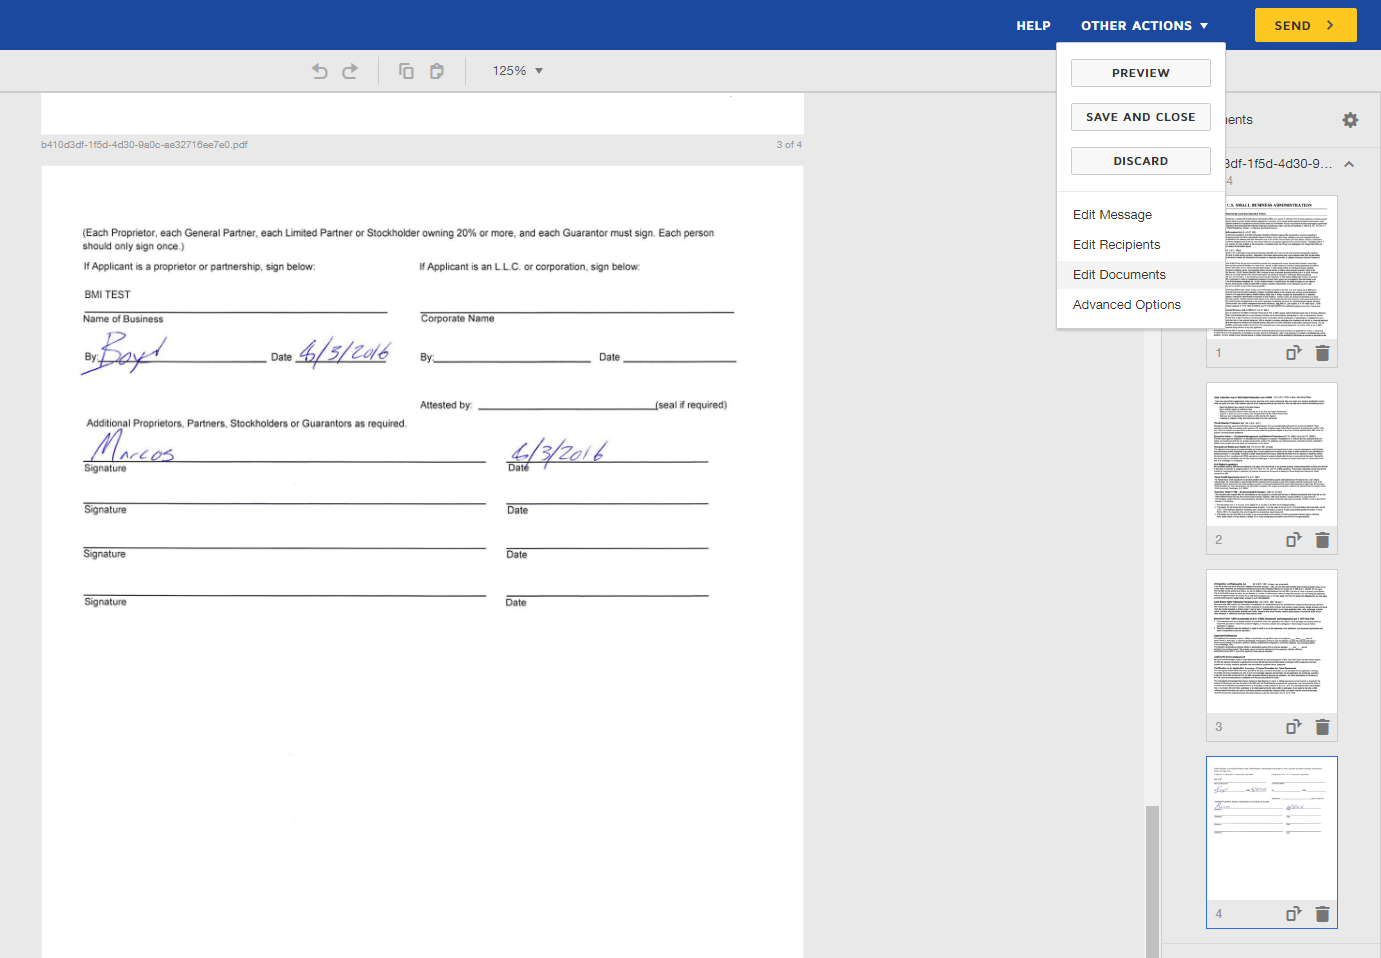
DocuSign Templates
To be sure that all signature fields be added correctly, use a template. To apply a template click the drop down menu located at the top right corner labeled “Other Actions”. In the drop down menu select “Edit Documents”.
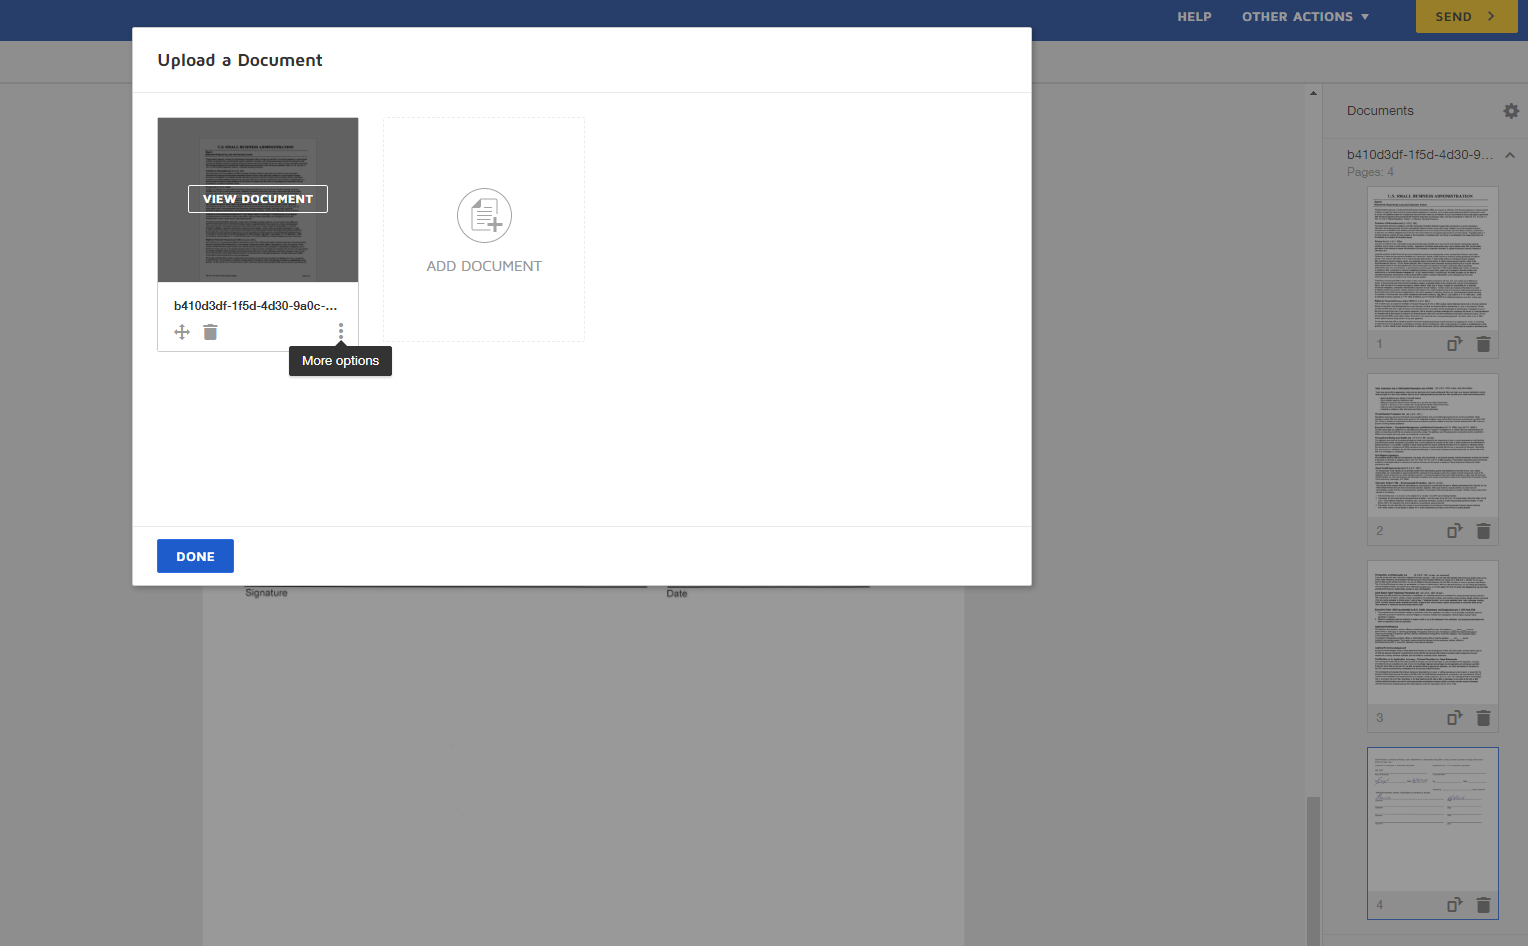
Applying Templates
After selecting the “Edit Documents” option, a small window will appear. Within this window a template may be applied. Under the selected document, click the 3 dots. They are labeled “More Options”.
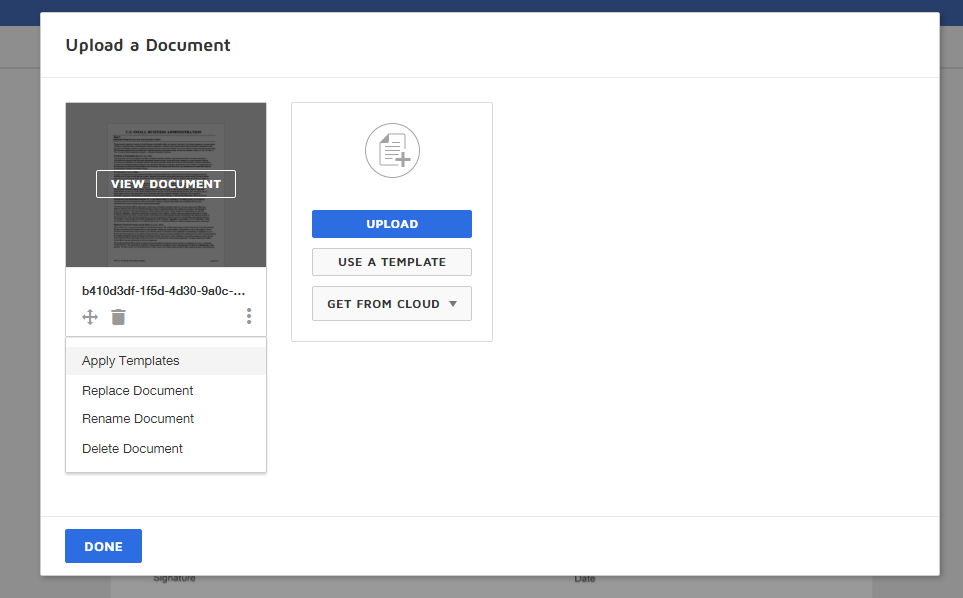
Applying Templates Continued
Under “More Options” the “Apply Templates” button will appear. Click it to select the specific template needed.
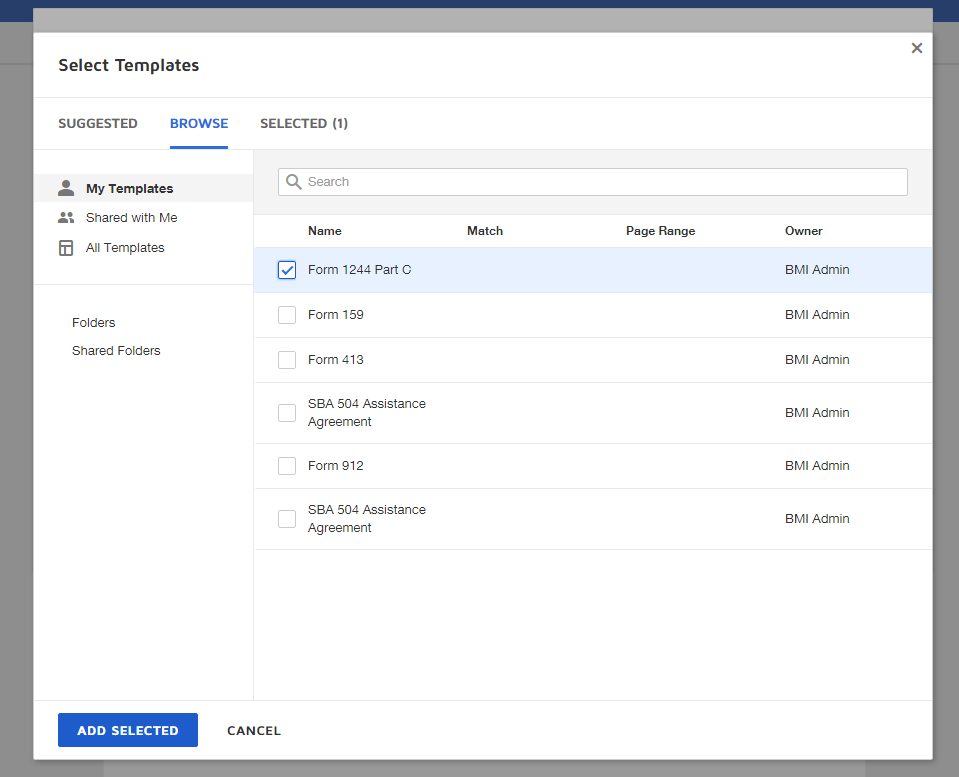
Select Template
Click the “Browse” tab to show all templates available. Be sure to find the matching template for the particular document(s) being worked on. In this case the document is a form 1244 part C. Check box the correct template and click the blue “Add Selected” button.

Template Applied
A message will appear to notify that the template has been successfully applied. Click “Done” to exit out of the pop up window.
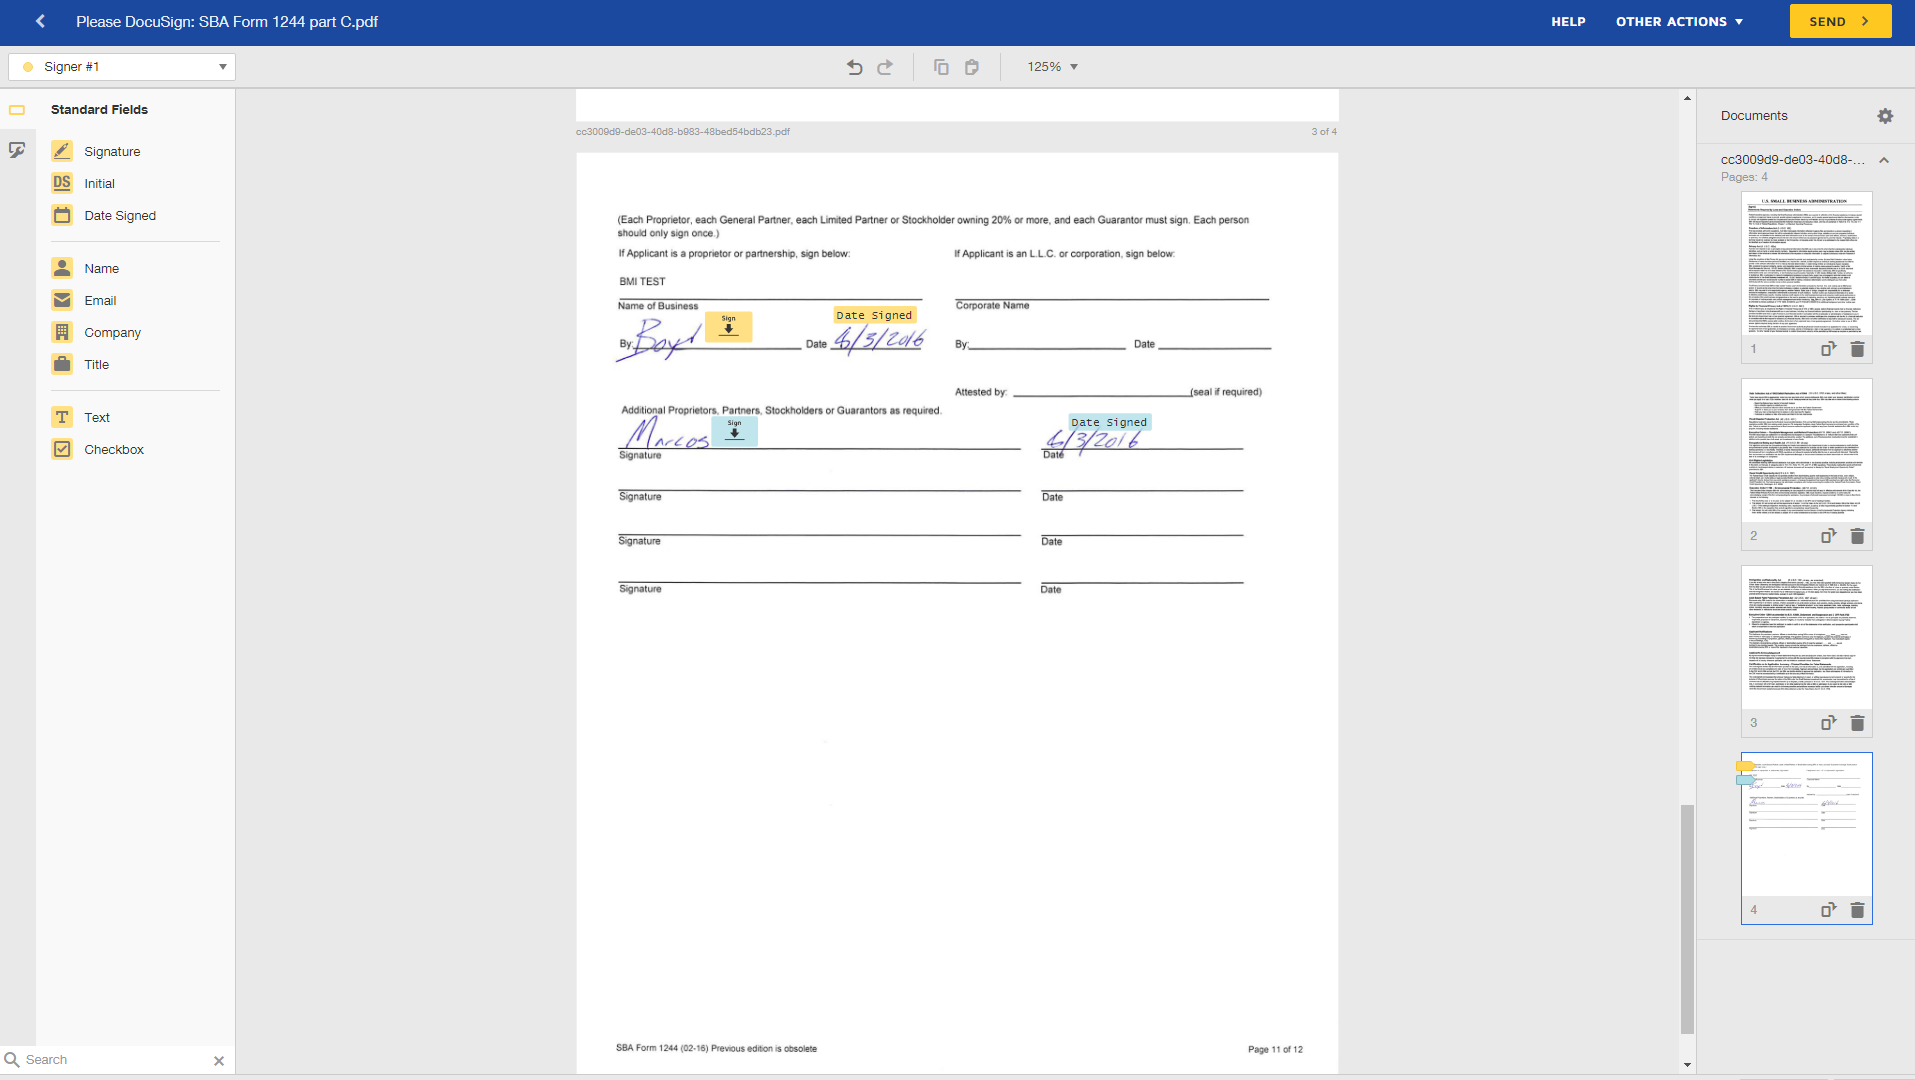
Prepare Document
With the appropriate template now applied, scroll down to review the signature fields that have been inserted. Move/delete fields according to needs. Be sure to leave space between the old signature and the new one.

Edit Recipients
With the document(s) now properly edited, it is time to assign recipients. On the top left corner click the drop down menu. Select “Edit Recipients”.
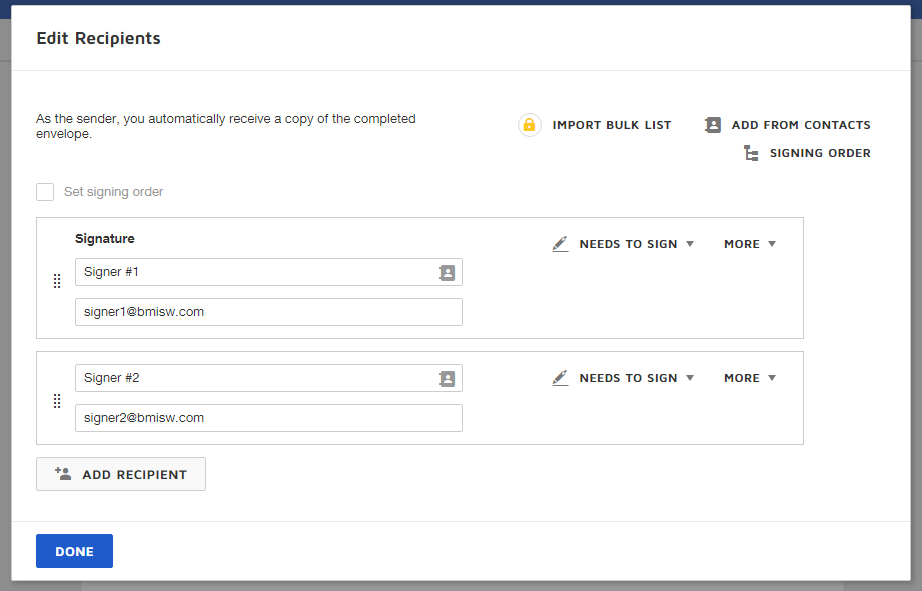
Assign Recipients
A window will pop up with the options to add/remove/change recipients.
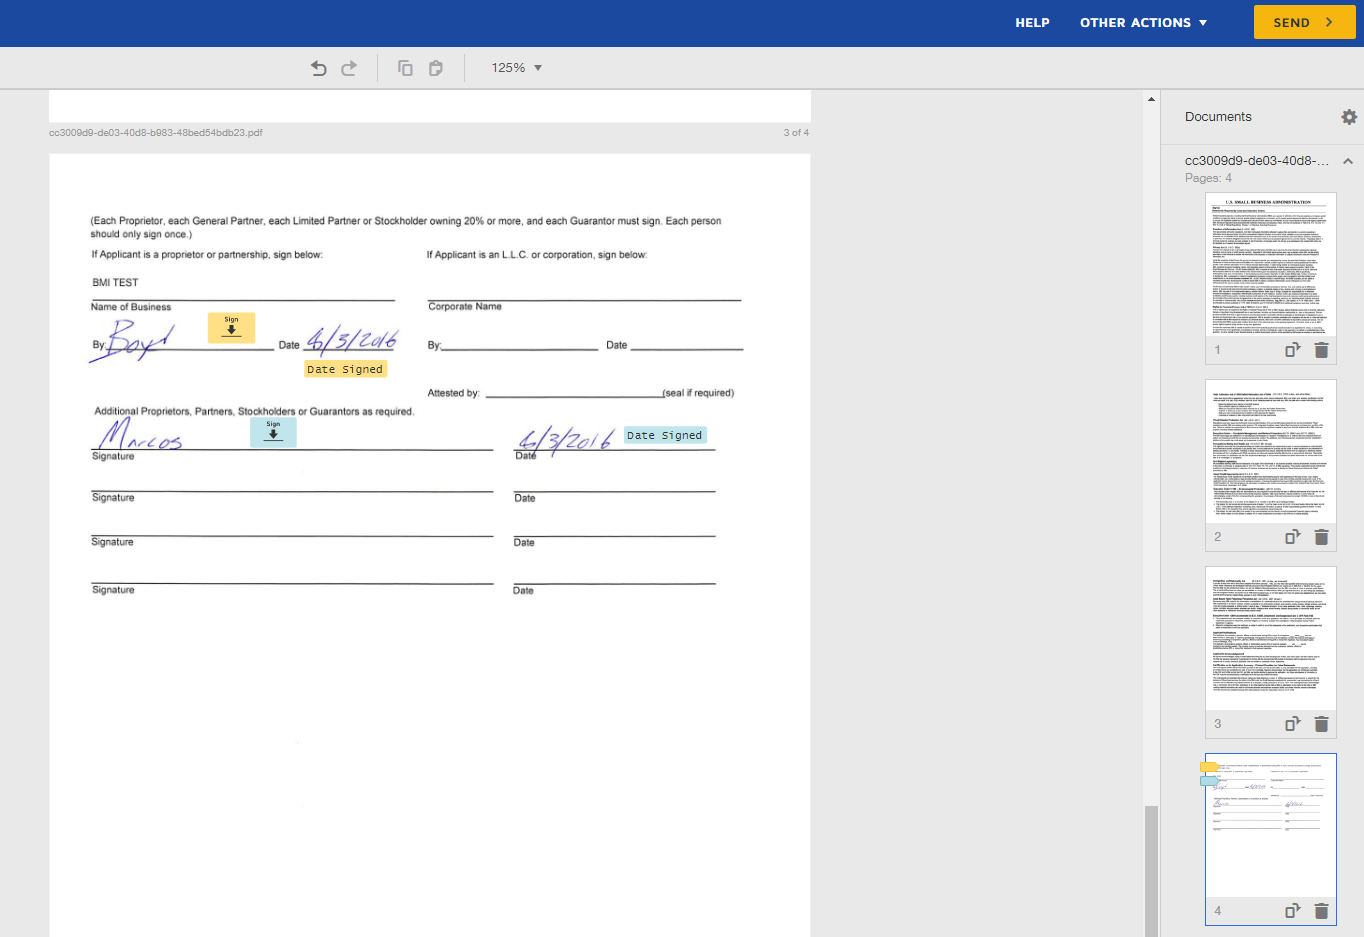
DocuSign Send
After adding the appropriate recipients, click “Done”. Review the document(s) and click the yellow “Send” button at the top right corner of the page.
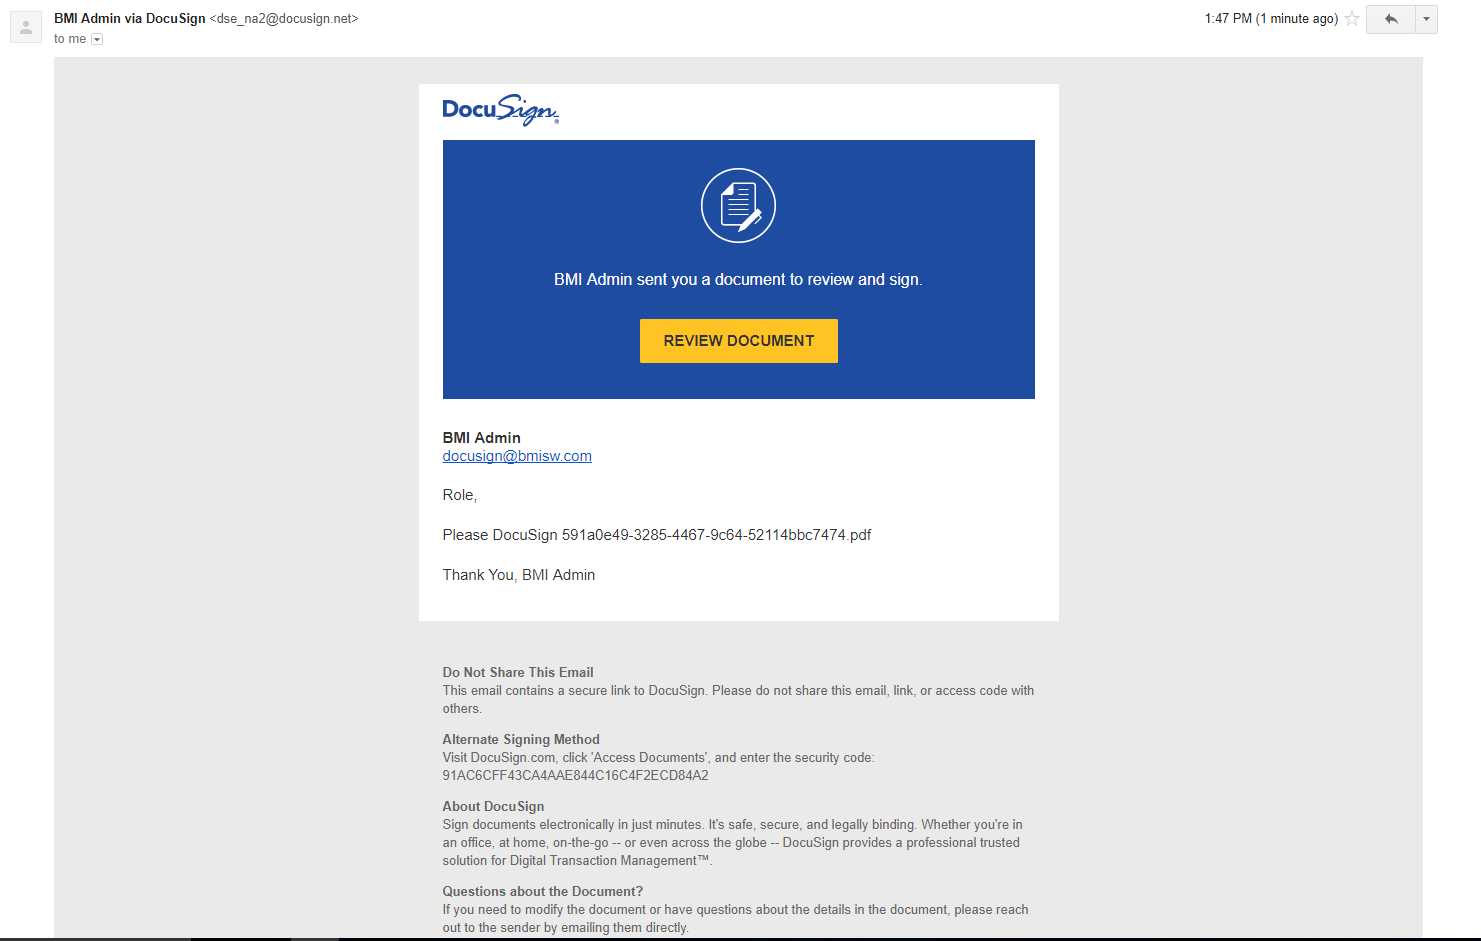
DocuSign Email
An email will instantly be sent out for the recipients to sign. When the email is opened it will appear as pictured above.

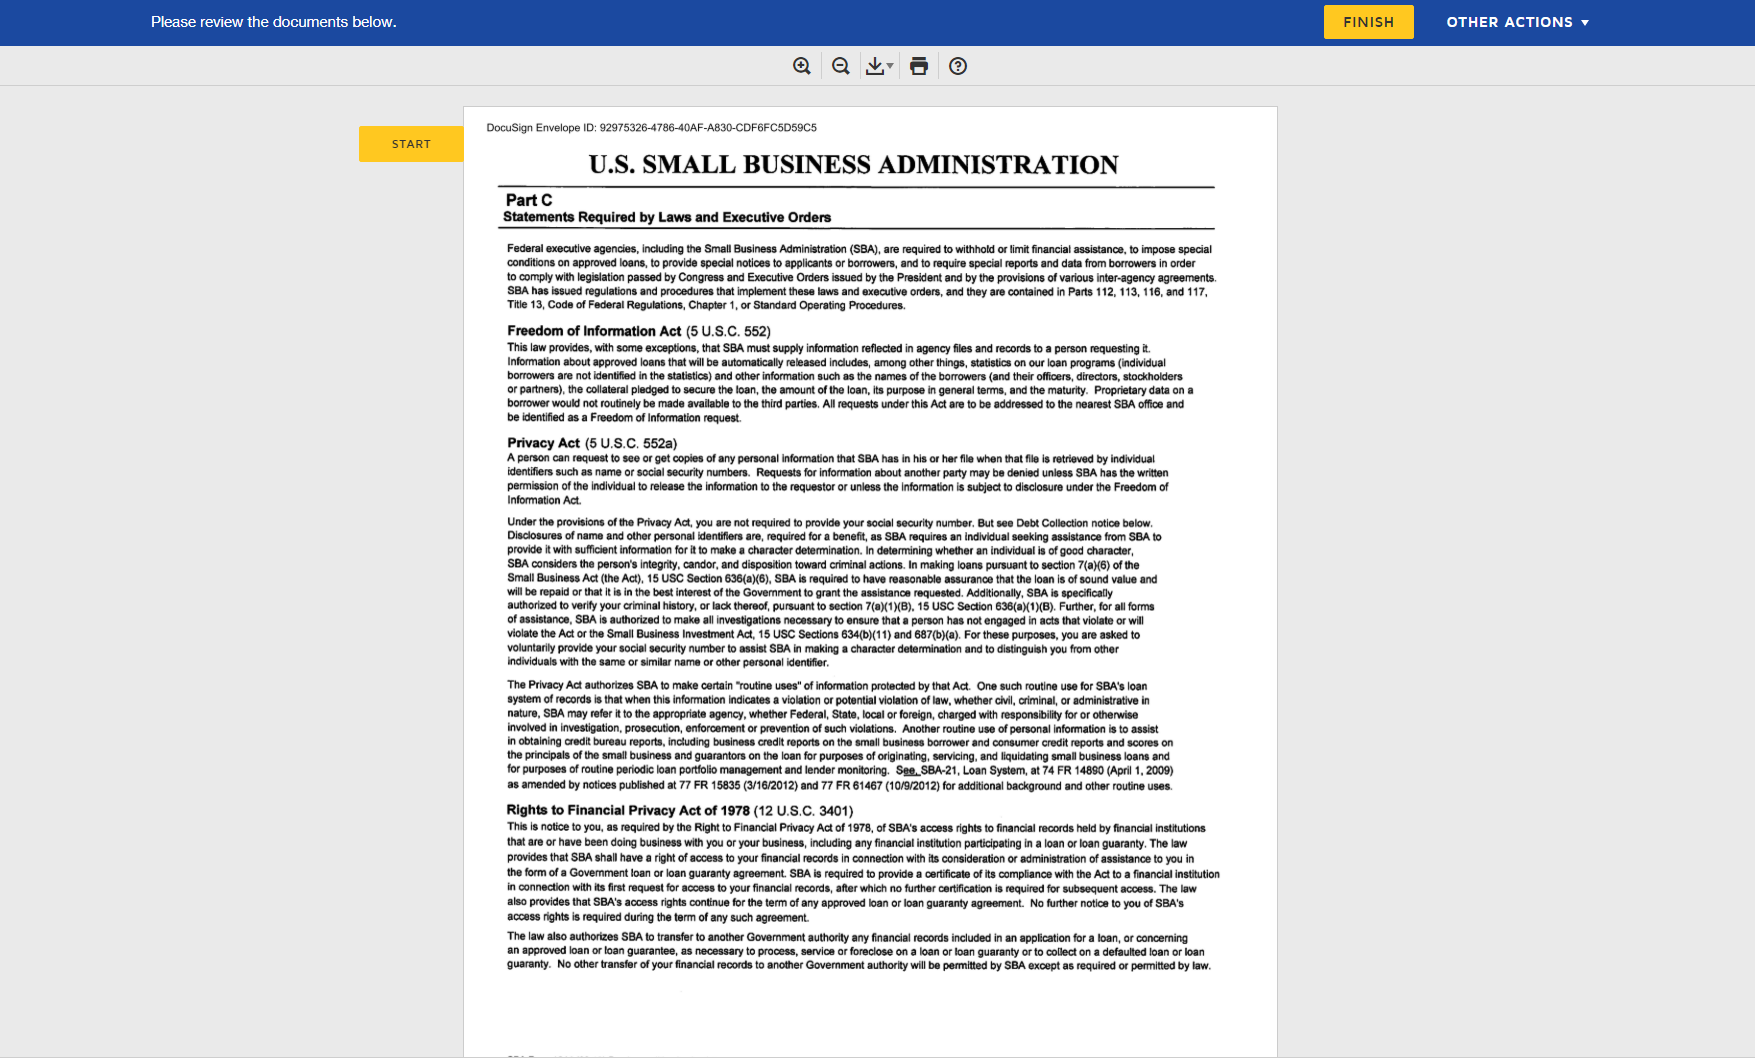
Sign Documents
When the recipients click “Review Document” a new window will appear with the document(s) ready to be signed. Recipients will need to click “Continue” and then “Start” in order to go through the document(s) and sign.
Review/Sign
Once “Start” has been selected simply scroll through the document(s) and fill out signatures as needed. A signature may be adopted or written out.
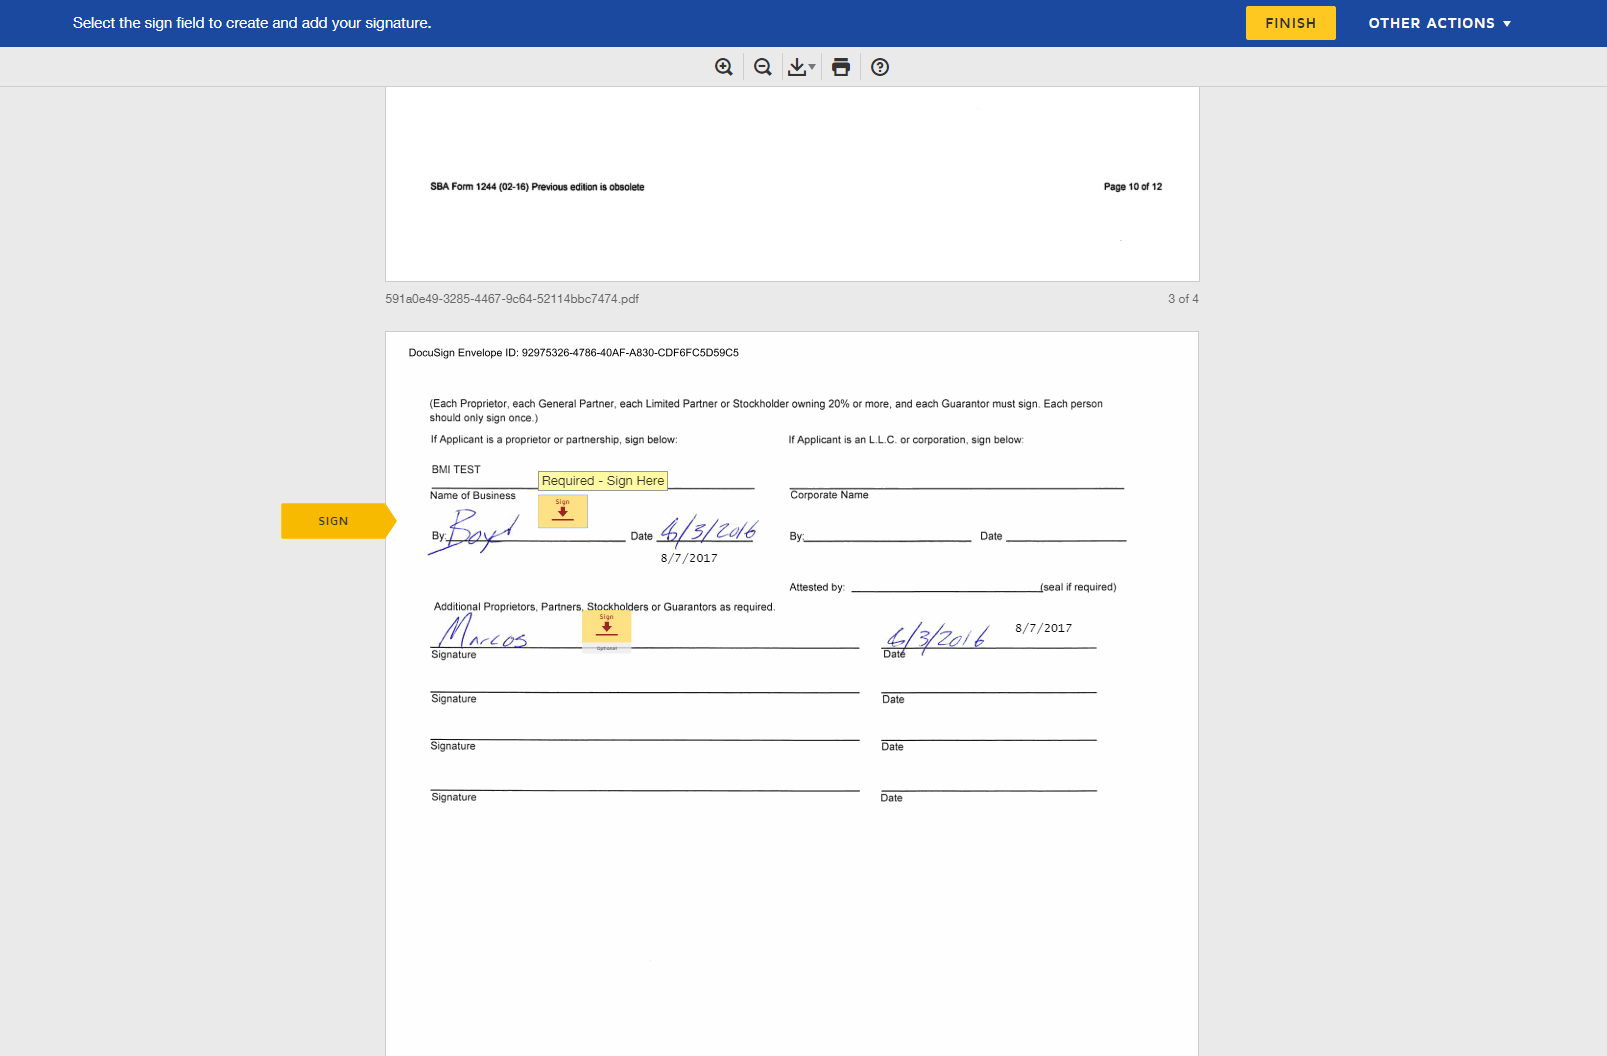
DocuSign Finish
Click “Sign” for signatures to be added. Review the document(s). Next, click “Finish” at the top right hand corner. An email will be sent back to the original sender.
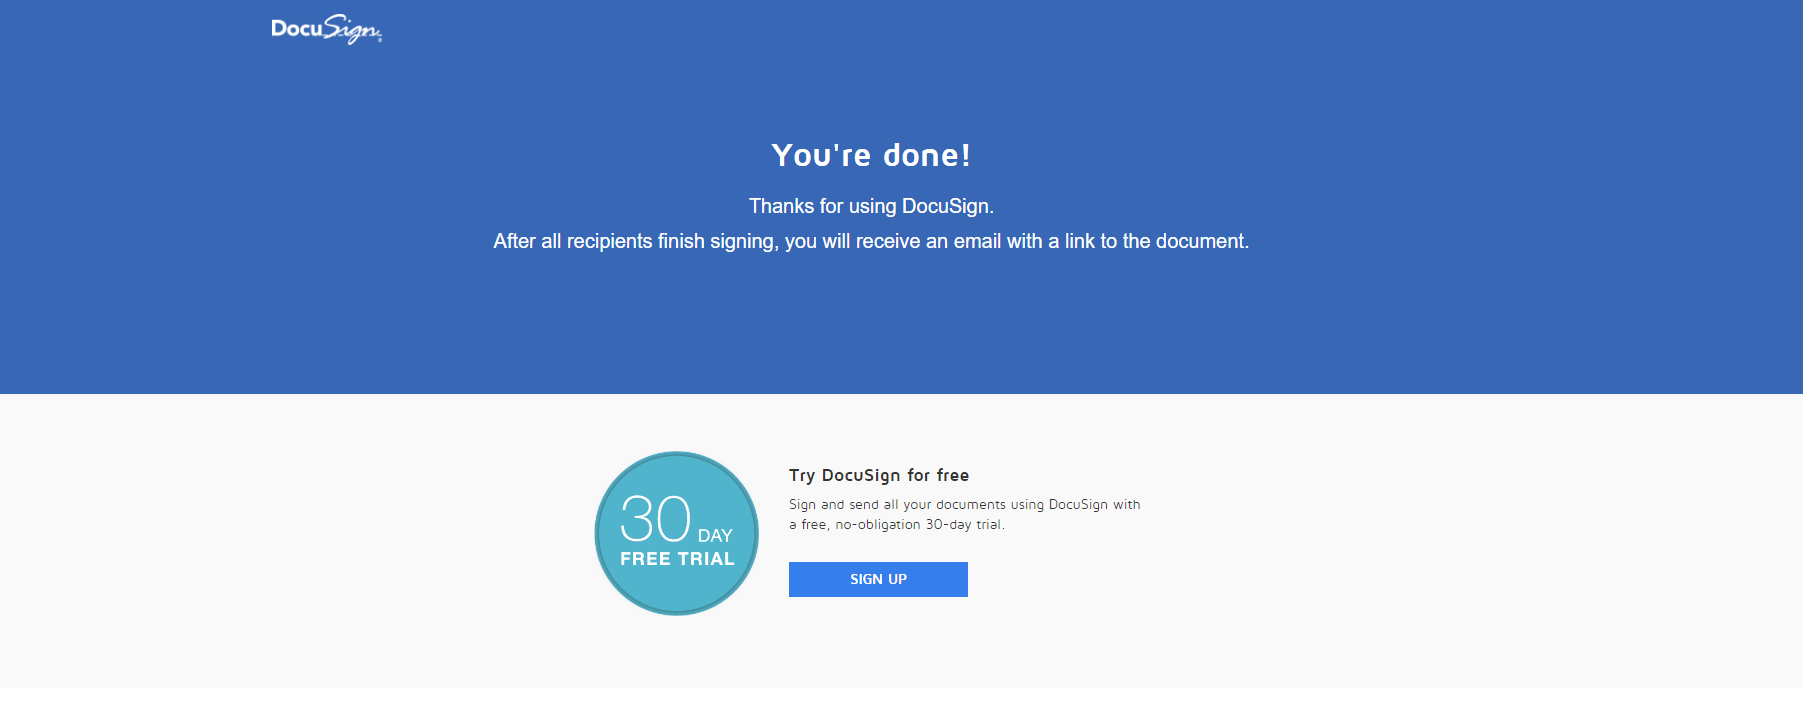
DocuSign Sent
Once signed and sent, a DocuSign window will appear as such. There will also appear a prompt to create a DocuSign account. You are not obligated to sign up.
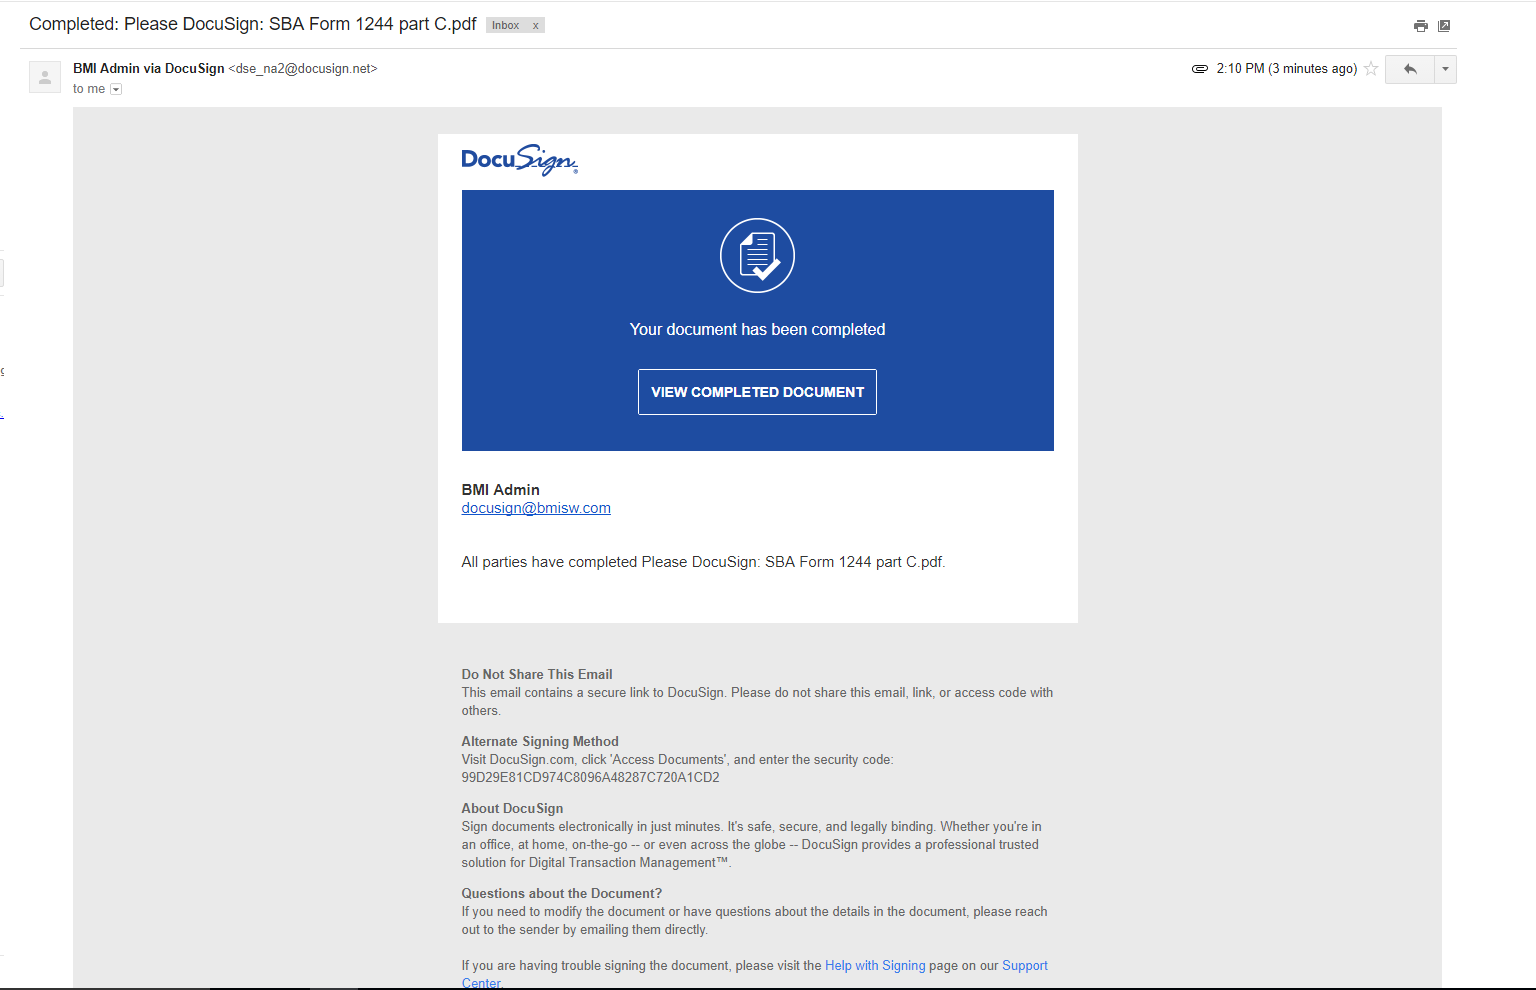
DocuSign Completed Email
The original sender will receive the new document(s). From there, the document(s) can be viewed and opened as the newly completed, re-signed document(s).

